
How to Mould a Mouthguard Without Ruining the Fit
Mould a boil-and-bite mouthguard step by step, check the fit and know when jaw pain, braces or dental work calls for professional help.
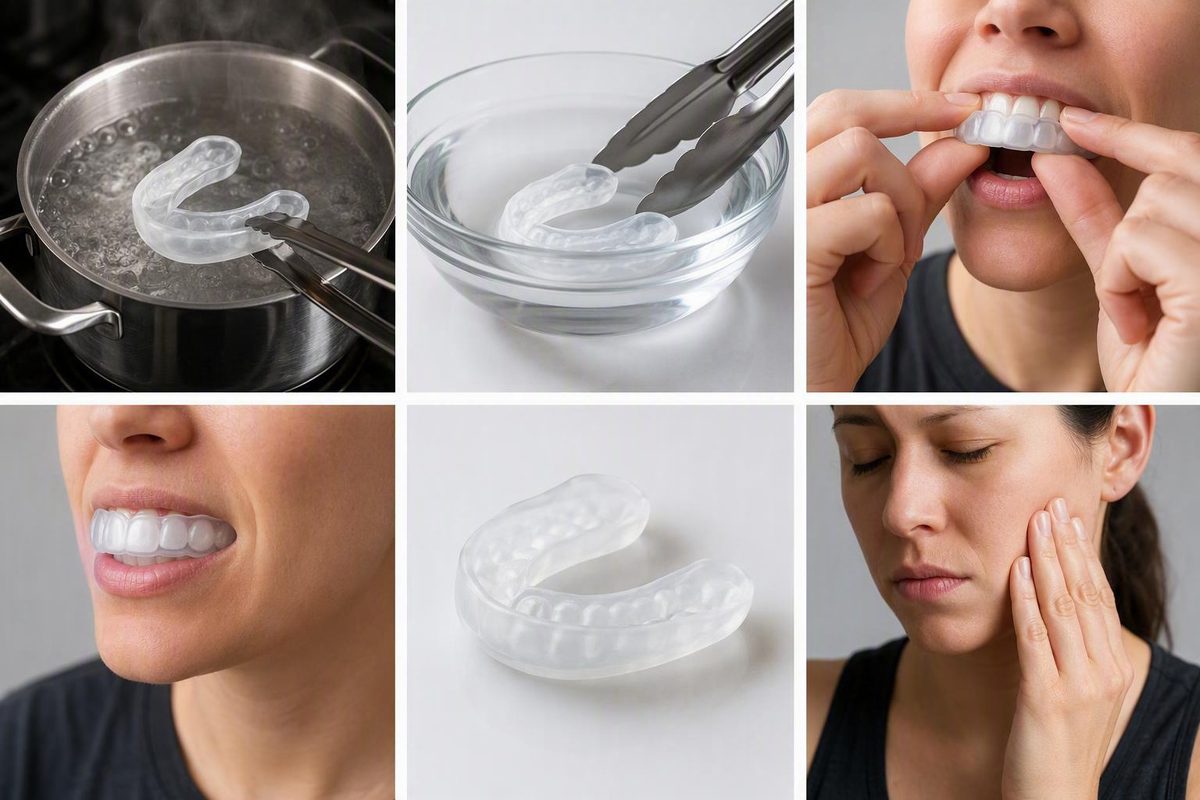
To mould a mouthguard, soften it for the exact time stated in its instructions, briefly cool the surface, centre it over the correct teeth, then bite, suck and press it into shape. Cool it fully before testing the fit.
That method is only for a product labelled boil-and-bite or mouth-formed. Do not heat a custom dental guard, a ready-made stock guard or any appliance whose instructions do not permit it.
Before you start
Check the package for:
- which arch it fits—most sports mouthguards cover the upper teeth;
- the specified water temperature and heating time;
- whether the water should remain boiling or be removed from the heat;
- whether the guard can be remoulded;
- any warning about braces, bridges, implants or recent dental work.
These details are not interchangeable. The American Dental Association (ADA) describes boil-and-bite guards as being softened in hot water for approximately 15 seconds, but that is a category description—not a universal timer. One current Shock Doctor model instead directs users to remove boiling water from the heat, wait 30 seconds and immerse that guard for 60 seconds. Use the timings supplied with your own model. Incorrect heating or superficial shaping can produce a poorly fitted guard, the ADA warns.
You will usually need a saucepan or heat-safe bowl, enough water to submerge the guard, a slotted spoon or suitable handle, a mirror, cold water and a timer. Wash your hands first.
How to mould it
-
Confirm the orientation. Identify the front, back and—if applicable—the upper-teeth channel before heating. Practise centring the cool guard in front of a mirror, but do not force it over teeth.
-
Heat it exactly as directed. Prepare the water and soften the guard for the package’s stated time. Keep fingers away from the hot water and do not leave the thermoplastic in longer “to make it softer.”
-
Lift and surface-cool it. Remove it with the recommended utensil or tether. Let excess water drain, then cool the surface only as instructed. It should be pliable but not hot enough to burn. If it still feels too hot, do not put it in your mouth.
-
Centre it over the teeth. Looking in the mirror, place it squarely over the arch named in the instructions—usually the upper teeth for a sports guard. Press it onto the back teeth and then the front teeth without twisting it.
-
Shape it. Close your teeth in the position shown by the manufacturer. Bite with the directed pressure, suck firmly to draw the material against the teeth, and press the outer surface through your lips and cheeks with your fingers. The ADA describes the adaptation process as using bite pressure plus the tongue, fingers and lips. Do not chew the softened guard.
-
Set the shape. Maintain pressure for the specified moulding time. Remove the guard carefully and place it in cold water for the directed period so the material firms up.
-
Test the fit. Reinsert it. A properly fitted sports mouthguard should stay comfortably and securely in place rather than requiring constant clenching, according to the ADA’s criteria. It should not rock, pinch sharply, trigger persistent gagging or obstruct comfortable breathing. Remould it only if its instructions expressly allow that. Do not cut or thin it unless the manufacturer says where and how.
Do not improvise around braces or jaw pain
Braces need a guard designed with room for tooth movement and brackets. The ADA advises discussing the right protection with a dentist or orthodontist; it also says not to wear a removable retainer during contact sports. Some ordinary boil-and-bite models are explicitly incompatible with braces. A hospital orthodontic leaflet notes that brace-compatible boil-and-bite guards may need remoulding and replacement as treatment moves the teeth. Ask the orthodontist before fitting one over fixed appliances rather than forcing a standard model into place (ADA; University Hospitals Plymouth).
A sports mouthguard and a therapeutic jaw splint are not automatically interchangeable. If the aim is to manage clenching, tooth wear or temporomandibular disorder (TMD) pain, first clarify which appliance is intended; mouthguard and splint designs have different uses and risks. The US National Institute of Dental and Craniofacial Research says evidence that intraoral appliances improve TMD pain is limited and advises stopping use and consulting the prescriber if an appliance causes pain (NIDCR). A newly moulded guard that creates jaw pain, pressure on one tooth or a bite that remains altered after removal needs dental review rather than repeated wear.
After moulding
Rinse the guard before and after use, let it dry, and keep it in a ventilated protective case. Keep it out of sun and hot water after fitting because heat can distort it. Replace it if it becomes damaged, worn or ill-fitting; the ADA also recommends taking it to dental checkups for evaluation (MouthHealthy). For a fuller care routine, see how to disinfect a mouthguard without damaging it.