
A Safer Routine for Cleaning and Deep-Cleaning Your Mouthguard
Clean gently after each use. For a deeper clean, use one device-compatible method, set a timer, rinse thoroughly, and dry the guard and case.
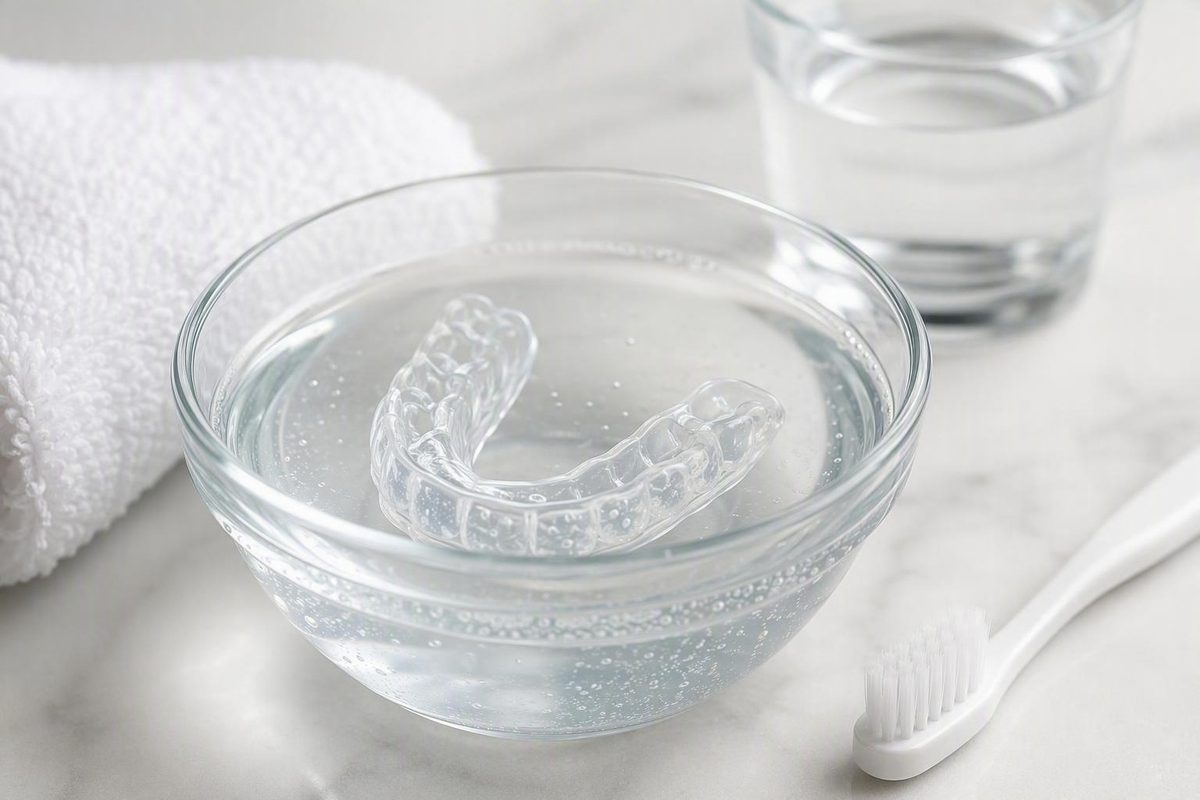
Home care can clean a mouthguard and may reduce microbial contamination, but the available evidence does not show that household methods sterilize it or achieve a defined level of disinfection. The safest general approach is gentle after-each-use cleaning, followed—when the appliance instructions permit it—by one time-limited deeper-cleaning method.
Quick answer: the lowest-risk mouthguard cleaning routine
If you need to clean a mouthguard now:
- Rinse promptly under cool or lukewarm running water.
- Brush every surface gently with a soft toothbrush reserved for the guard and a small amount of mild, preferably fragrance-free soap.
- Rinse thoroughly until no cleaner residue, smell, or taste remains.
- Air-dry completely on a clean surface.
- Store the dry guard in a clean, sturdy, ventilated case.
This routine is a conservative starting point for many night guards and sports mouthguards. Dental-practice guidance recommends cool or lukewarm water, a soft brush, mild soap, complete drying, and ventilated storage after each use (see the daily-care guidance). However, even mild care instructions may vary for custom acrylic appliances, soft liners, bonded layers, coatings, metal components, and unidentified materials.
Before soaking any mouthguard, check:
- The package or instruction leaflet
- The manufacturer’s website
- Directions from the dentist who prescribed or fitted it
- The cleaner’s label, if using a commercial tablet
Device-specific directions take priority over general guidance.
For routine care, mild soap is a safer editorial default than toothpaste. Some dental practices permit explicitly nonabrasive toothpaste, while others advise against toothpaste because abrasive or whitening ingredients may scratch certain appliances. Mild soap avoids requiring the user to judge a toothpaste’s abrasiveness (compare the soap and toothpaste guidance).
Keep these supplies together:
- A soft-bristled toothbrush used only for the guard
- Mild, preferably fragrance-free soap
- A clean drying surface
- A timer for any approved soak
- A clean, ventilated storage case
Home cleaning can remove saliva, loose debris, ordinary residue, and cleaner remnants. A compatible soak may help with deposits or contamination, but it should not be described as making the appliance sterile or guaranteed germ-free.
Cleaning, deep cleaning, disinfection, and sterilization are not the same
People searching for how to disinfect a mouthguard may encounter the words clean, deep-clean, sanitize, and disinfect used interchangeably. The supplied guidance does not establish that they produce equivalent results.
Routine cleaning means physically removing saliva, food residue, loose debris, plaque-like material, and leftover cleaner. Rinsing and gentle brushing do most of this work.
Deep cleaning is an informal description of an occasional, more intensive cleaning step, generally involving a compatible, time-limited soak. The phrase does not identify a tested antimicrobial standard.
Disinfection normally implies an antimicrobial result. However, the available home-care sources generally do not report a defined reduction in microorganisms for a particular mouthguard material, solution, concentration, and contact time.
Sterilization is a stronger claim. None of the household methods discussed here should be described as sterilizing a mouthguard or making it germ-free.
Used mouthguards can carry microorganisms. A dental-practice review of published research reports that bacteria, yeasts, and molds have been recovered from used athletic mouthguards (review the contamination discussion). That supports regular cleaning, but it does not prove that routine mouthguard use causes infection, tooth decay, gum disease, or systemic illness.
The practical goal at home is therefore limited: remove residue, reduce avoidable contamination, preserve the appliance’s surface and fit, and recognize when ordinary cleaning is no longer enough. This is maintenance guidance, not a clinical decontamination protocol.
The after-each-use routine, step by step
1. Rinse promptly
Rinse the guard under cool or lukewarm running water as soon as you remove it. Turn it over so water reaches the interior, exterior, biting surface, grooves, edges, and deeper tooth impressions.
The rinse carries away loose saliva and debris before they dry. Do not use hot water in an attempt to improve cleaning.
For a sports guard, rinse it after practice or competition rather than leaving it unwashed in a closed equipment bag. Clean a night guard in the morning instead of leaving residue on it until bedtime.
2. Use a separate soft toothbrush
Keep a soft-bristled toothbrush specifically for the mouthguard. A separate brush avoids cross-use with the toothbrush used on your teeth and makes it less likely that you will reach for a hard brush or abrasive scrubber.
Do not use scouring pads, metal tools, pins, knives, or other sharp implements to remove buildup. Aggressive scraping can leave rough areas or damage the appliance.
3. Brush gently with mild soap
Apply a small amount of mild soap to the damp brush or guard. Brush all accessible areas:
- The tooth-facing interior
- The outer surface
- Grooves and impressions
- The biting surface
- The edges
- Creases where residue collects
Use light pressure. The goal is to loosen residue, not polish the appliance or scrub away every stain. Fragrance-free soap is preferable when available because heavily scented products may leave an unpleasant smell or taste.
Avoid soaps with exfoliating particles or abrasive additives. If the mouthguard has a soft liner, coating, bonded layers, metal parts, or unknown construction, confirm its instructions before applying any cleaner.
4. Rinse until no cleaner remains
Rinse every surface thoroughly under cool or lukewarm water. Continue until the guard is no longer slippery and no soap smell or taste remains.
Pay particular attention to deep tooth impressions, where suds may become trapped. A cleaner suitable for washing still needs to be removed before the appliance returns to the mouth.
If a soap taste remains, rinse again rather than covering it with mouthwash or another product.
5. Air-dry completely
Place the guard on a clean surface where air can circulate around it. Let it dry completely before closing it inside its case.
Do not accelerate drying with a hair dryer, heater, microwave, direct sunlight, hot-air vent, or heated appliance cycle. A clean towel may remove large droplets, but it does not replace air-drying.
Avoid leaving the mouthguard wrapped in a damp towel, tissue, or paper product.
Before putting in a night guard
Clean your teeth before inserting a night guard. Brushing and cleaning between the teeth can reduce the food residue trapped beneath the appliance and may help control odor. This is a cleanliness measure, not a guarantee against dental problems.
If you missed a cleaning
Do not compensate by:
- Scrubbing harder
- Switching to hot water
- Increasing a cleaner’s concentration
- Combining several cleaners
- Extending a soak for hours
- Leaving the appliance immersed overnight
Repeat the normal gentle routine. If residue remains, use one device-compatible deeper-cleaning option for its stated contact time. If that does not work, ask the manufacturer or a dentist what to do next.
Three optional methods for a deeper clean
A deeper clean supplements after-each-use brushing; it does not replace it. Choose one method that the manufacturer or prescribing dentist considers compatible. Vinegar, diluted hydrogen peroxide, and cleaning tablets are alternatives, not stages in a required sequence.
| Method | Preparation | Conservative contact time | Final steps | Compatibility cautions |
|---|---|---|---|---|
| Diluted white vinegar | Mix one part white vinegar with three parts water | 15–30 minutes (method and timing) | Remove, brush gently if needed, rinse thoroughly, and air-dry | Confirm that acidic solutions are permitted for the material, liner, coating, and bonded components |
| Diluted 3% hydrogen peroxide | Mix equal parts 3% hydrogen peroxide and water | 10–30 minutes; supplied instructions range from a 10-minute soak to a maximum of 30 minutes (shorter method; upper limit) | Remove, rinse until no residue or taste remains, and air-dry | Use only a starting product labeled 3%; do not substitute an unspecified or stronger concentration |
| Compatible cleaning tablet | Dissolve a dental-appliance or denture-cleaning tablet in the amount and temperature of water stated on its label | Follow the label exactly; one practice describes 10–15 minutes or the package-specified duration (tablet directions) | Rinse thoroughly and air-dry | A product intended for dentures is not automatically compatible with every mouthguard |
Vinegar: mainly an option for deposits
Diluted white vinegar is commonly recommended for cloudy, white, or mineral-like deposits.
That does not establish sterilization, and it does not show that every soft-lined, layered, coated, or metal-containing appliance can tolerate an acidic solution. Use it only after confirming compatibility.
Hydrogen peroxide: concentration matters
If the appliance instructions allow peroxide, use the preparation and contact-time range in the table. The starting concentration must be identified; “hydrogen peroxide” by itself is too vague.
Remove the mouthguard when the timer ends, rinse it thoroughly, and let it dry. Bubbling is not proof that the appliance has been sterilized or that a defined level of disinfection has been achieved.
Cleaning tablets: check both products
A cleaning tablet is a reasonable option only when:
- Its label identifies it for dental appliances or dentures; and
- The mouthguard’s instructions allow that category of cleaner.
Follow the tablet label for water temperature, dose, and contact time. Formulations vary, so “denture cleaner” should not be treated as a single, universally compatible product.
If the cleaner’s label does not address your appliance type, ask the mouthguard manufacturer or dentist before using it.
How often should you deep-clean?
Once weekly can be used as a practical starting point for a frequently worn guard, but it is not a clinically proven universal schedule. Some dental-practice instructions recommend weekly treatment, while others describe monthly deep cleaning. Frequency should therefore be adjusted according to:
- The appliance instructions
- Frequency and duration of wear
- Material and construction
- How quickly deposits form
- Athletic exposure
- Whether visible residue or odor returns
- Advice from the prescribing dentist
Deep-cleaning more often is not automatically better. If routine soap-and-water care is working, repeated chemical exposure may be unnecessary.
Do not combine cleaning solutions
Use only one cleaning method at a time. The supplied evidence does not establish that mixing cleaners—or following vinegar with peroxide—improves the result or is compatible with every appliance.
Set a timer for any soak. Unless the manufacturer expressly instructs otherwise, do not extend a short cleaning treatment into an overnight soak. If one properly performed treatment fails, seek device-specific advice rather than increasing the concentration or contact time.
Baking soda and alcohol-free mouthwash appear in some mouthguard-care articles, but the supplied evidence does not establish either as a validated disinfectant. Their cleaning or freshening roles remain uncertain, and material compatibility varies.
Products and cleaning mistakes that can damage a mouthguard
A cleaner mouthguard is not safer if the process warps it, roughens its surface, damages a liner, or changes its fit.
Hot water and direct heat
Avoid:
- Boiling or very hot water
- Dishwashers
- Microwaves
- Clothes dryers
- Hair dryers
- Heaters and radiators
- Direct sunlight
- Heat inside parked vehicles
Heat can distort some mouthguard materials and alter how the appliance seats over the teeth. Dental-practice guidance specifically warns that hot water may warp a guard and change its fit (see the heat and material cautions).
A boil-and-bite guard may originally have been shaped with heated water, but that does not make reheating a suitable cleaning method. Do not try to repair a warped appliance at home unless its manufacturer provides instructions for remolding that exact product.
Bleach and harsh household cleaners
Avoid household bleach, bathroom cleaners, surface disinfectants, kitchen degreasers, and other harsh chemicals unless authoritative instructions for that exact appliance expressly permit them.
Mouthguard materials are not interchangeable, and products intended for household surfaces are not automatically suitable for items worn in the mouth. Increasing chemical strength is not a dependable solution to persistent odor, staining, or deposits.
Alcohol-based cleaners
Avoid alcohol-based mouthwash and other alcohol-containing cleaners unless the appliance manufacturer specifically approves them. Dental-practice guidance warns that alcohol, bleach, harsh cleaners, and prolonged exposure may damage some night-guard materials (review the product cautions).
A product’s suitability as a brief oral rinse does not prove that it is compatible with prolonged contact against every plastic, liner, dye, coating, or adhesive.
Abrasive or whitening toothpaste
Toothpaste advice is inconsistent. Some care instructions allow nonabrasive toothpaste; others recommend avoiding toothpaste because abrasive particles may scratch the appliance. Whitening pastes present the clearest concern.
For general care, use mild soap. Use toothpaste only if the mouthguard instructions expressly allow it, and then select a nonabrasive, non-whitening formula.
Long or overnight soaks
Do not routinely store a mouthguard submerged in cleaner or plain water unless its instructions require wet storage. Extended exposure may be unsuitable for some materials, liners, adhesives, or surface finishes.
If a time-limited soak does not remove a problem, do not automatically extend it for several hours. Remove the guard, rinse it, inspect it, and seek advice.
Mouthwash as a primary disinfectant
Alcohol-free mouthwash is not established here as a primary mouthguard disinfectant. Supplied recommendations vary substantially in contact time, which is another reason not to assume a universal protocol.
If the manufacturer permits an alcohol-free rinse, treat it as an occasional cleaning or freshening option. Follow the allowed contact time and rinse the guard afterward.
Incompatible denture cleaners
Denture-cleaning products differ in active ingredients and intended materials. A product formulated for a rigid denture may not be appropriate for a soft, layered, coated, or bonded mouthguard.
Check both the cleaner label and the mouthguard instructions. If either is unclear, do not experiment.
Use one device-compatible cleaner at a time, follow its stated dose and contact time, and rinse the mouthguard thoroughly afterward.
If a guard becomes warped or no longer seats normally, stop using it and seek advice.
Drying, storage, and case cleaning prevent the cycle from restarting
Cleaning is not complete until the mouthguard and its case are dry.
Dry the guard before closing the case
After the final rinse, place the guard on a clean surface and allow air to reach it. Close it inside its case only when it is completely dry.
Returning a clean appliance to a damp or dirty case can reintroduce residue and contamination. If the case is wet, leave it open to dry separately.
Choose a protected drying location where the guard will not be exposed to household cleaning sprays, floor contamination, pets, or direct sunlight.
Use a protective, ventilated case
A suitable case should be:
- Sturdy enough to prevent crushing
- Large enough not to bend the appliance
- Ventilated
- Clean and dry
- Stored in a cool, dry location
Do not wrap the appliance in tissue, a napkin, or a paper towel. These materials provide little protection and make the mouthguard easier to discard accidentally. Custom night-guard instructions recommend dry case storage away from direct sunlight and specifically warn against wrapping the appliance in disposable paper products (see the storage instructions).
Clean the case regularly
With daily use, washing the case every few days is a practical routine; at minimum, weekly cleaning is commonly recommended. One dental-practice guide advises washing the case with dish soap every few days and drying it completely (case-care guidance).
To clean the case:
- Remove the mouthguard.
- Wash the inside, outside, hinges, and ventilation openings with soap and water.
- Rinse thoroughly.
- Leave the case open until completely dry.
- Return the guard only when both items are dry.
Replace a case if damage prevents it from closing securely, protecting the appliance, ventilating properly, or being cleaned effectively.
Bring custom guards to dental visits
Bring a custom night guard or dental splint to routine dental appointments. A dentist can inspect its cleanliness, wear, fit, rough areas, deposits, and structural changes.
This is particularly useful after fillings, crowns, dental movement, or other changes that may affect how the appliance seats.
Troubleshooting odor, deposits, illness, damage, and poor fit
When ordinary cleaning does not solve the problem, do not respond automatically with a stronger chemical or longer soak. First determine whether the issue is removable residue, case contamination, deposits, material wear, structural damage, or a fit change.
Persistent odor
Odor does not by itself prove that dangerous bacteria are trapped in the appliance. Possible contributors include retained residue, incomplete drying, a dirty case, deposits, surface roughness, oral residue, or material deterioration.
Try this sequence:
- Repeat the routine soap-and-water cleaning.
- If permitted, use one time-limited deeper-cleaning method.
- Rinse and dry the guard completely.
- Wash and dry the case.
- Inspect the guard under good light for cracks, roughness, thinning, or worn areas.
- Clean your teeth before the next use.
If odor remains after appropriate cleaning, stop extending soaks or rotating through products. Ask a dentist whether the appliance can be professionally cleaned or should be replaced.
White or mineral-like deposits
For a compatible appliance, diluted white vinegar is a commonly recommended option for whitish deposits: one part vinegar to three parts water for 15–30 minutes, followed by gentle brushing, thorough rinsing, and drying (see the deposit-cleaning method).
Do not scrape stubborn deposits with a knife, pin, metal dental tool, or abrasive pad. If the deposits remain after one properly timed treatment, seek dental assessment rather than increasing the vinegar concentration or soak duration.
Cloudiness or discoloration
Use one compatible cleaning method and inspect the appliance after it dries. If discoloration remains—especially with roughness, cracks, thinning, odor, or a changed fit—have it assessed.
A cosmetic change does not necessarily mean the appliance is unsafe. Conversely, an appliance may look clean while being worn, distorted, or poorly fitting. Appearance is only one part of the decision.
Cracks, holes, tears, and rough areas
Seek professional review or replacement if you notice:
- Cracks or chips
- Tears or holes
- Substantial thinning
- Separating layers
- Warping
- Sharp or rough areas
- A surface that remains difficult to clean
- Persistent odor or discoloration after appropriate care
Do not fill holes with household adhesive or sand rough areas yourself.
Loose, tight, changed, or painful fit
Stop using the appliance and contact the dentist or manufacturer if it:
- Falls out or becomes noticeably loose
- No longer seats fully
- Suddenly feels too tight
- Rocks or shifts
- Rubs or cuts the mouth
- Causes new discomfort
- Appears twisted, shrunken, or expanded
A distorted or damaged guard may no longer perform as intended. Cleanliness alone does not determine whether it remains usable. Orthodontic care guidance identifies cracks, tears, warping, discomfort, and poor fit as reasons for professional review or replacement.
Vomiting, blood, contagious illness, or heavy contamination
The supplied evidence does not establish a universal household protocol for a mouthguard exposed to vomiting, blood, contagious illness, or a heavily contaminated surface. Appliance materials and designs differ, and a stronger home treatment would not guarantee decontamination.
Do not improvise with bleach, boiling, extended soaking, or several cleaning agents. Contact:
- The manufacturer for product-specific directions
- The dentist who prescribed or fitted the appliance
- Another dental professional if the original provider is unavailable
Use the same cautious approach if the wearer is immunocompromised or the appliance has a soft liner, bonded layers, several materials, or an unidentified composition.
Replacement decisions
There is no single supported replacement interval for every stock guard, boil-and-bite product, sports guard, custom acrylic night guard, or layered appliance. Prioritize condition and fit rather than a universal calendar.
Consider:
- Frequency and intensity of use
- Grinding or chewing damage
- Hard athletic impacts
- Material and construction
- Changes in teeth or dental work
- Fit and comfort
- Manufacturer instructions
- Persistent deposits, odor, or discoloration
A dentist may be able to assess or professionally clean a custom guard. In other cases, replacement is more appropriate than repeated chemical treatment.
Pain Catalog covers jaw and TMJ pain as general educational material rather than individualized diagnosis (read the site’s editorial scope). Under Pain Catalog’s medical-safety notice, jaw locking, trauma, or jaw pain accompanied by fever warrants prompt clinical attention; the same notice explains that the site’s content is educational, not diagnostic (read the medical-safety notice).
Frequently asked questions
Can I soak a mouthguard in 3% hydrogen peroxide?
Only if the manufacturer or dentist confirms that peroxide is compatible with the appliance.
The conservative preparation and contact-time range are listed in the comparison table above. Use a product labeled 3% hydrogen peroxide, dilute it as directed, set a timer, rinse thoroughly, and air-dry. Do not treat bubbling as proof of sterilization.
If the material is unknown or the care instructions do not mention peroxide, choose routine soap-and-water cleaning and ask for device-specific advice.
How long should I soak a mouthguard in vinegar?
For an appliance confirmed to tolerate vinegar, the commonly recommended limit is 15–30 minutes in a solution of one part white vinegar to three parts water.
Do not leave the guard in vinegar overnight. If deposits remain after one bounded soak and gentle brushing, ask a dentist about professional cleaning rather than increasing the concentration or duration.
Can I use toothpaste or mouthwash to clean a mouthguard?
Possibly, but neither is the best universal default.
Some instructions permit nonabrasive, non-whitening toothpaste, while others advise avoiding toothpaste entirely because it may scratch the appliance. Mild soap is the more conservative routine choice.
Avoid alcohol-based mouthwash unless the manufacturer expressly permits it. Alcohol-free mouthwash is not established here as a primary disinfectant and should be used only according to device-specific instructions.
How often should I deep-clean a night guard or sports mouthguard?
Clean it gently after every use. For a frequently worn guard, weekly deeper cleaning can be a practical starting point, but it is not a universal clinical requirement.
Some care instructions recommend weekly treatment and others monthly treatment. Adjust the schedule according to the manufacturer’s directions, frequency of wear, deposits, athletic exposure, material, and advice from the prescribing dentist.
When should I replace a mouthguard instead of cleaning it again?
Seek professional assessment or replacement if the guard has:
- Cracks, chips, tears, or holes
- Substantial thinning
- Warping or distortion
- Rough or sharp surfaces
- Separating layers
- A changed, loose, tight, or uncomfortable fit
- Persistent odor or discoloration after appropriate cleaning
- Deposits that cannot be removed gently
Also seek advice after unusual contamination when no device-specific protocol is available. Do not rely on one fixed replacement age; material, use, impacts, grinding, fit, and condition all matter.
The simplest decision rule is this: clean gently after every use; choose no more than one device-compatible deeper-cleaning method; use a timer; rinse thoroughly; dry the guard and case completely; and protect the appliance from heat and abrasion. If the material is unknown, contamination is unusual, or the guard is cracked, warped, persistently odorous, discolored, uncomfortable, or poorly fitting, stop escalating home treatments and ask the manufacturer or a dentist whether professional cleaning or replacement is appropriate.