
A Safer Routine for Keeping Your Dental Splint Clean and Undamaged
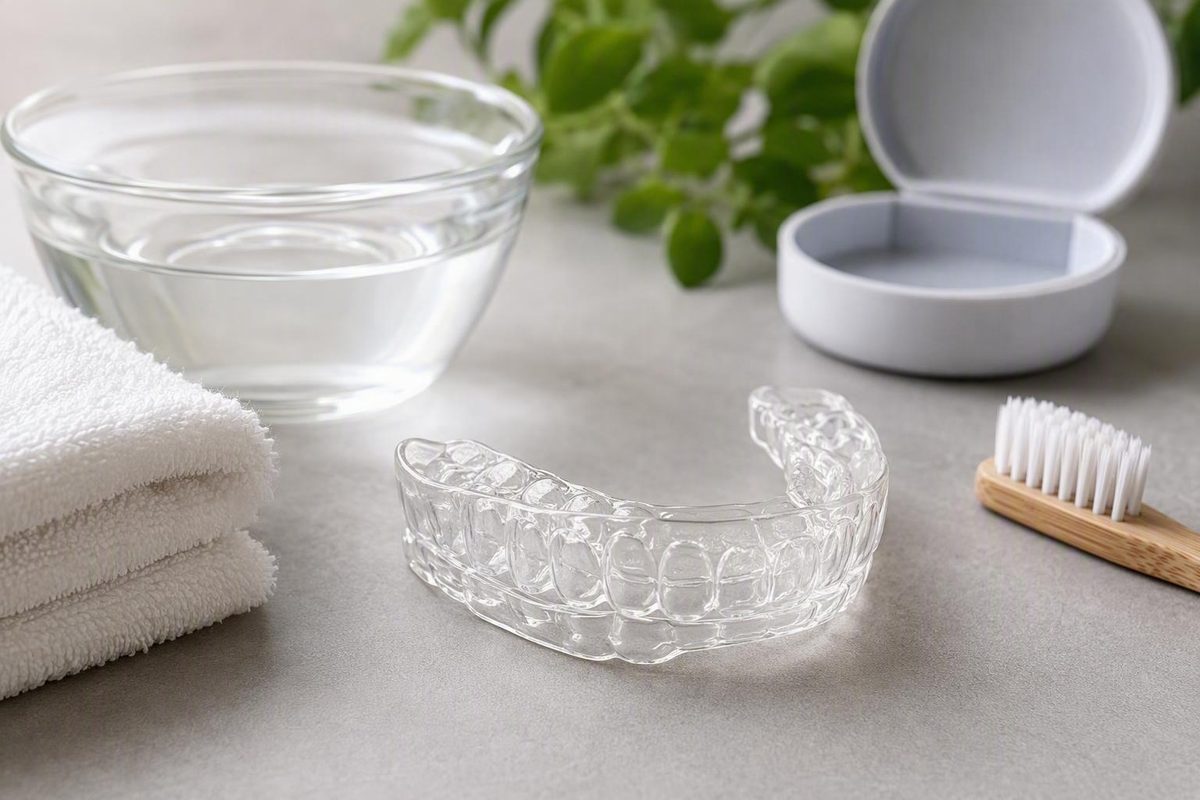
Mouth splint cleaning usually does not require harsh chemicals, expensive equipment, or a complicated routine. A cautious starting point is to rinse the appliance promptly with cool or lukewarm water, clean it gently with mild fragrance-free soap, rinse thoroughly, let it air-dry, and keep its case clean.
That routine is not universal. “Mouth splint” can describe appliances made from different plastics, acrylics, liners, bonded layers, and mechanical components. Even brushing may be unsuitable for some surfaces. Instructions from the treating dentist, manufacturer, or dental laboratory should therefore override general online advice.
Chemical soaking is optional and device-dependent. If the material or construction is unknown, postpone tablets, homemade soaks, ultrasonic cleaning, and UV treatment until the dental office confirms compatibility.
This article provides general education rather than diagnosis or individualized dental advice. Much of the available guidance comes from dental-practice and manufacturer instructions rather than comparative clinical trials covering every splint material.
Start With the Splint, Not the Cleaner
Before selecting a cleaner, identify the appliance.
A custom occlusal splint, also called a bite splint or bite guard, is made to fit a particular person’s teeth. A night guard may be custom-made or purchased over the counter. A mandibular advancement appliance positions the lower jaw as prescribed and may contain hinges, connectors, screws, or metal parts. Dental professionals may also use “splint” as a broader term for other removable appliances.
These devices should not automatically be treated like:
- Sports mouthguards designed to absorb impacts
- Orthodontic retainers intended to maintain tooth position
- Clear aligners intended to move teeth
- Stock or boil-and-bite guards
- Partial dentures or other removable prostheses
A dentist-authored overview, for example, distinguishes custom dental splints from sports mouthguards and identifies occlusal and mandibular advancement appliances as different types of dental splints (Genesis Dental’s splint guide).
Before using anything beyond water and mild soap, check for:
- The appliance name or model
- Written care instructions
- The documented material
- A soft inner liner
- Bonded hard and soft layers
- Colored sections or markings
- Hinges, screws, connectors, or metal parts
- Repairs, relined areas, or added attachments
These details matter because materials and components may respond differently to brushing, soaking, heat, and cleaning chemicals. A method tolerated by a hard acrylic splint may be unsuitable for a flexible guard, soft liner, bonded appliance, or device with moving parts.
If the appliance type, material, or instructions are unknown, contact the office that supplied it. Until compatibility is confirmed, use the conservative after-use routine below. Do not assume that a cleaner is safe simply because it is marketed for a similar-looking retainer, denture, sports guard, or aligner.
The Conservative After-Use Cleaning Routine
For an appliance of unknown material, begin with cool or lukewarm water, a small amount of mild fragrance-free liquid soap, and gentle handling.
- Remove the splint with your fingers. Use the technique demonstrated by your dentist, particularly if the splint is rigid or fits tightly.
- Rinse it promptly. Cool or lukewarm running water helps remove loose saliva and residue before they dry.
- Apply a small amount of mild soap. Choose plain, fragrance-free liquid hand soap or dish soap rather than a strongly scented, colored, abrasive, or alcohol-containing product.
- Clean gently. If brushing is permitted, use a dedicated soft-bristled toothbrush on the inner surface, outer surface, edges, and accessible tooth grooves.
- Rinse thoroughly. Continue until no visible foam or slippery residue remains.
- Inspect the appliance. Look for cracks, rough edges, separated layers, loose parts, or an altered shape.
- Air-dry completely. Leave it on a clean, stable surface or in an open, breathable case away from heat, sunlight, pets, and children.
- Store it as directed. Dry storage is a reasonable default for many splints, but appliance-specific instructions may require another method.
Use light pressure. The goal is to loosen residue, not polish the surface. Do not bend the appliance to reach a groove, force bristles beneath a bonded layer, or repeatedly scour one discolored area.
Many dental-care instructions recommend a soft brush, but some manufacturers caution that brushing can scratch certain plastics. Follow the device instructions if they prohibit brushing. Stop and contact the dental office if cleaning produces new cloudiness, fine lines, roughness, loss of gloss, color changes, or another visible surface change (Efferdent’s appliance-care guidance).
Before reinserting the splint, brush and floss your teeth when practical. If that is not possible, rinse your mouth thoroughly and remove obvious food residue. This limits the material trapped between the appliance and the teeth.
One-minute daily checklist
- [ ] Remove the splint with your fingers
- [ ] Rinse promptly with cool or lukewarm water
- [ ] Apply a small amount of mild fragrance-free soap
- [ ] Clean every accessible surface gently
- [ ] Do not bend, force, or aggressively scrub
- [ ] Rinse until no cleaner remains
- [ ] Check for surface, component, or shape changes
- [ ] Leave the appliance open to air-dry completely
- [ ] Clean your teeth before the next use when practical
Drying, Storage, and Case Care
Cleaning is not complete until the splint and case have been rinsed, dried, and stored correctly.
After washing, inspect the appliance under running water. Continue rinsing until there is no visible foam, fragrance, or slippery film. Do not taste the appliance to test whether cleaning solution remains.
Place the splint on a clean, stable surface or in an open case. Some dental-practice instructions estimate that air-drying may take approximately 15 to 30 minutes, but actual drying time depends on the appliance’s thickness and shape, ventilation, humidity, and water trapped in grooves or moving parts (Middlebury Dental Center’s mouthguard guidance). If moisture remains, keep drying rather than relying on the clock.
Once dry, a hard, protective, ventilated case is a sensible default. It protects the appliance from crushing while allowing residual moisture to escape. Confirm that the vents are open and the case itself is clean and dry.
There is no universal answer to whether every splint should be stored dry or immersed. Many night guards and bite splints are stored dry, while some appliance-specific instructions may call for water or a designated solution. Follow the documentation supplied with the device rather than substituting generic storage advice.
Clean the case regularly:
- Remove the appliance.
- Wash the case with soap and water at least weekly, or sooner if it is visibly dirty.
- Clean its grooves, hinges, and ventilation holes.
- Rinse it thoroughly.
- Leave it open until it is completely dry.
Returning a clean splint to a damp or dirty case undermines the cleaning routine. If the case remains slimy, stained, cracked, or persistently odorous after washing, ask the dental office whether it should be replaced.
Store the appliance in a cool, secure place away from:
- Direct sunlight and sunny windowsills
- Radiators and heating vents
- Hot vehicles
- Bathroom steam or persistent humidity
- Hairdryers and other direct heat
- Pets, especially dogs
- Small children
- Bags or containers where the case could be crushed or contaminated
Do not wrap the splint in a tissue or napkin. It may be damaged, dry unevenly, or be discarded accidentally.
Products and Methods: What Is Safe, Conditional, or Best Avoided
The following comparison separates a cautious generic routine from methods that require appliance-specific approval.
| Conservative default | Use only if specifically approved | Avoid without direct professional or manufacturer instructions |
|---|---|---|
| Cool or lukewarm water | Denture, retainer, or appliance-cleaning tablets | Hot or boiling water |
| Mild fragrance-free liquid soap | A specified non-abrasive, non-whitening toothpaste | Abrasive or whitening toothpaste |
| Dedicated soft brush, if brushing is permitted | Diluted white vinegar | Bleach |
| Gentle cleaning with light pressure | Diluted 3% hydrogen peroxide | Alcohol-based products |
| Thorough rinsing | Brief diluted alcohol-free mouthwash soak | Harsh household chemicals |
| Complete air-drying | Ultrasonic cleaner and approved solution | Baking-soda scrubs or paste |
| Clean, ventilated protective case | UV device approved for that exact appliance | Stiff brushes or aggressive scrubbing |
| Appliance-specific care instructions | Storage in water or a designated solution | Dishwasher, microwave, or hairdryer |
| Cleaner approved for the device’s material and components | Prolonged, overnight, or improvised soaking |
Toothpaste
Recommendations conflict. Some dental sources permit a small amount of non-abrasive, non-whitening toothpaste, while others advise avoiding toothpaste because it may scratch or dull the appliance.
Consumers cannot always determine a toothpaste’s abrasiveness or a splint surface’s scratch resistance. Mild fragrance-free soap is therefore the safer generic choice. Use toothpaste only if the appliance instructions or treating dental office permits a particular product or type.
If toothpaste has already been used, inspect the appliance under good light. Stop using it and request advice if you notice new cloudiness, fine scratches, roughness, or loss of gloss.
Cleaning tablets
Denture, retainer, or appliance-cleaning tablets may be suitable for some splints. They are not automatically compatible with every soft liner, hard-soft laminate, bonded surface, colored section, repair, or metal component.
If a tablet is approved:
- Use the specified water temperature.
- Follow the label concentration.
- Set a timer for the stated soak period.
- Do not extend the soak or leave the appliance overnight unless expressly instructed.
- Rinse the appliance thoroughly afterward.
- Discard the used solution.
A longer soak should not be assumed to provide a better or safer result.
Vinegar, hydrogen peroxide, and mouthwash
Recommendations for vinegar, hydrogen peroxide, and mouthwash differ substantially in concentration, exposure time, frequency, and eligible appliance type. That variation does not support one universal homemade recipe.
Use these products only when the appliance instructions or treating dental office confirms compatibility and provides an exact dilution and exposure time. Never increase the concentration, extend the soak, or add hot water.
Do not mix cleaners. Keep vinegar, hydrogen peroxide, mouthwash, tablets, bleach, and other products separate unless the instructions for that exact appliance expressly provide a defined process. General dental-care guidance also cautions against combining cleaning agents and against exceeding directed soak times (Knox Valley Dental’s mouthguard-care precautions).
Do not improvise by:
- Using several chemical treatments in succession
- Combining a tablet with another cleaner
- Reusing a chemical solution
- Guessing a concentration
- Increasing exposure because a stain remains
- Treating visible discoloration as proof that the appliance is still dirty
Ultrasonic and UV devices
An ultrasonic cleaner may loosen residue from some appliances, but compatibility should be confirmed first. This is especially important for splints with soft liners, bonded layers, repairs, colored components, hinges, screws, or metal hardware. Use only an approved solution and cycle length.
Apply the same caution to UV devices. A unit marketed for phones, toothbrushes, or household objects is not automatically suitable for a dental appliance. Use UV treatment only when the appliance manufacturer or treating dental office approves the device and exposure method.
Neither ultrasonic nor UV treatment should be described as universally superior, necessary, or capable of sterilizing every mouth splint.
How Often to Deep-Clean Without Overdoing It
The reviewed guidance does not support one deep-cleaning schedule for every splint.
Some dental-practice instructions recommend weekly treatment (Collins Dental’s mouthguard-care guidance).
Other dentist-authored guidance recommends deep cleaning every two to four weeks (Genesis Dental’s splint-care schedule).
It does not justify choosing the strongest cleaner or shortest interval.
Use this decision order:
- Follow the schedule supplied with the appliance.
- Use only cleaners approved for its material and construction.
- Follow the stated concentration, water temperature, and soak time.
- Rinse thoroughly and air-dry afterward.
- Stop if the color, surface, flexibility, smell, components, or fit changes.
- If no instructions are available, ask the treating dental office before beginning a recurring chemical soak.
Do not create a standing vinegar, peroxide, or mouthwash recipe from general online advice. Directions written for an acrylic bite splint may not suit a flexible guard, soft liner, colored appliance, bonded device, or appliance with metal hardware.
More frequent or prolonged soaking is not automatically more effective. Unapproved chemical exposure may damage some appliances. Persistent residue is a reason to seek assessment, not to keep extending the soak.
Sample maintenance calendar
| Timing | Task |
|---|---|
| After every use | Rinse, clean gently using the approved method, rinse thoroughly, and air-dry |
| Before reinsertion | Brush and floss, or at minimum rinse away food residue |
| Weekly | Wash and dry the case; inspect the appliance under good light |
| As directed | Use an approved tablet or chemical cleaner at the specified concentration and time |
| At routine dental appointments | Bring the splint and case for evaluation of cleanliness, wear, condition, and fit |
| When a problem appears | Contact the dental office about damage, discomfort, fit changes, persistent odor, or buildup |
Troubleshooting Odor, Cloudiness, Stains, and White Deposits
When a splint looks or smells different, begin with the lowest-risk reset:
- Rinse it with cool or lukewarm water.
- Clean it gently with mild fragrance-free soap using the approved brush or method.
- Rinse until no cleaner remains.
- Wash and rinse the case.
- Let the splint and case dry completely in a clean, ventilated place.
- Inspect both under good light.
Persistent odor
Odor alone does not prove an infection or identify a specific kind of buildup.
Check the case as well as the appliance. Odor can return when a cleaned splint is placed into a damp or contaminated container. Inspect grooves, rough areas, cracks, bonded seams, and hardware where residue may be difficult to reach.
If the odor persists after conservative cleaning and complete drying, contact the dental office. Professional cleaning, inspection, or replacement may be more appropriate than bleach, stronger chemicals, or prolonged soaking (Kaleen Family Dental Surgery’s splint-care guidance).
Cloudiness and scratches
It may not be possible to distinguish these causes at home.
If gentle cleaning does not remove the cloudiness, do not assume a stronger chemical will. Stop any recently introduced cleaner and ask the dental office to inspect the appliance if cloudiness is accompanied by persistent roughness, fine lines, loss of gloss, altered flexibility, or a changed fit.
White or chalky deposits
White or chalky areas may be consistent with mineral deposits, but users cannot always distinguish mineral buildup from plaque, scratching, crazing, or material deterioration.
If the instructions specifically approve diluted vinegar for mineral deposits, follow the supplied dilution and exposure time exactly, then rinse thoroughly. Otherwise, ask the dental office instead of experimenting.
Do not scrape deposits with a fingernail, knife, pin, dental tool, or abrasive powder. Aggressive scraping can damage the surface.
Yellowing and staining
Yellowing or staining does not guarantee that the appliance can—or should—be restored to its original appearance.
Inspect before intensifying the cleaning routine:
- Is the surface still smooth?
- Are there cracks, separated layers, or loose parts?
- Has the appliance become more flexible or rigid?
- Does it seat differently?
- Is there a new odor?
- Did the change follow a new cleaner, soak, or heat exposure?
If staining remains after the approved routine, request professional assessment. Do not work through progressively stronger products or longer soak times simply to make the splint look new.
Avoid Heat and Other Fit-Damaging Mistakes
Heat is one of the clearest cleaning hazards. Hot or boiling water can distort some acrylic and thermoplastic appliances and change how they fit. Manufacturer guidance for removable appliances specifically warns that extreme heat can permanently distort acrylic and produce an uncomfortable, poorly fitting device (Polident’s removable-appliance guidance).
Avoid uncontrolled heat from:
- Hot or boiling water
- Dishwashers
- Microwaves
- Hairdryers
- Hot vehicles
- Radiators and heating vents
- Sunny windowsills
- Direct sunlight during drying
- Steam
Do not try to reshape a warped appliance by reheating it, bending it, or pressing it onto the teeth. Contact the treating dental office for assessment.
Other common mistakes include:
- Using abrasive or whitening toothpaste without approval
- Scrubbing with a medium or stiff brush
- Applying a baking-soda paste
- Scouring one discolored area
- Bending the appliance while cleaning grooves
- Closing a wet splint inside its case
- Using bleach or harsh household chemicals
- Using alcohol-based products without specific approval
- Mixing cleaners
- Guessing concentrations
- Soaking longer than directed
- Running an unapproved ultrasonic or UV cycle
- Assuming a sports guard, retainer, bite splint, and sleep-apnea appliance share the same instructions
Stop before using a soak or machine if any of these apply:
- [ ] The material is unknown
- [ ] The appliance has a soft liner
- [ ] It contains bonded layers or colored sections
- [ ] It has hinges, screws, connectors, or metal parts
- [ ] It is already cracked, rough, warped, or separating
- [ ] Its fit has recently changed
- [ ] Cleaning instructions are missing
- [ ] A previous cleaner changed its color, surface, flexibility, or smell
In these situations, rinse conservatively and request device-specific guidance before brushing aggressively, soaking, or using a cleaning machine.
When Cleaning Is No Longer the Answer
Inspect the splint under good light at least weekly. Turn it slowly and examine the biting surface, tooth grooves, edges, seams, and moving components.
Look for:
- Cracks, splits, holes, or perforations
- Thinning
- Jagged, chipped, or rough edges
- Warping or loss of symmetry
- Separated layers
- Loose components
- Deep scratches that retain residue
- Persistent deposits that do not respond to approved cleaning
- Discoloration accompanied by surface deterioration
Fit and comfort matter as much as appearance. Contact the treating dental office promptly if the appliance:
- Feels loose or falls out more easily
- No longer seats fully
- Becomes difficult to insert or remove
- Creates a new pressure point
- Causes new discomfort
- Rocks, twists, or catches
- Appears visibly distorted
- Develops a sharp or broken edge
Do not keep wearing an uncomfortable, cracked, sharp, warped, or poorly fitting splint while attempting to solve the problem with stronger cleaning. Pause use and ask the treating dental office what to do; dental-practice guidance likewise recommends assessment when a splint is cracked, deformed, uncomfortable, persistently odorous, or no longer fits normally (Kaleen Family Dental Surgery’s splint-care guidance).
Cleaning cannot repair mechanical damage. Persistent odor, stubborn deposits, rough areas that retain residue, or discoloration accompanied by structural change also warrant professional evaluation. A dental professional may be able to distinguish removable buildup from surface damage, a repair problem, or a reason to remake the appliance.
Bring both the splint and its case to routine dental appointments. Custom night-guard instructions from one dental practice specifically recommend bringing the guard to appointments for wear and fit checks (custom night-guard home-care instructions).
Avoid relying on a fixed replacement age. Appliances differ in construction, thickness, use, clenching or grinding load, repairs, and care. Condition, fit, comfort, function, and professional assessment are more useful than a universal number of months or years.
Printable mouth splint care checklist
After every use
- [ ] Rinse promptly with cool or lukewarm water
- [ ] Clean gently with mild fragrance-free soap or the prescribed method
- [ ] Rinse away all cleaner
- [ ] Inspect for obvious damage
- [ ] Air-dry completely
- [ ] Store as directed in a clean protective case
Before wear
- [ ] Brush and floss when practical
- [ ] At minimum, rinse away food residue
- [ ] Rinse the splint if required by its instructions
- [ ] Confirm that it seats normally and feels comfortable
Every week
- [ ] Wash the case with soap and water
- [ ] Dry the case completely
- [ ] Inspect the splint under good light
- [ ] Check for cracks, thinning, rough edges, separated layers, and loose parts
- [ ] Note changes in fit, color, texture, odor, or flexibility
Only when approved
- [ ] Use the designated deep cleaner
- [ ] Follow the exact concentration
- [ ] Follow the specified water temperature
- [ ] Set a timer for the directed soak
- [ ] Never combine cleaners
- [ ] Rinse thoroughly and air-dry afterward
Contact the dental office if
- [ ] Odor or buildup persists
- [ ] The appliance is cracked, sharp, warped, or separating
- [ ] The fit has changed
- [ ] It causes discomfort or pressure
- [ ] It is difficult to seat or remove
- [ ] Its material or cleaning compatibility is unknown
Frequently Asked Questions
Can I clean a mouth splint with toothpaste?
Only if the instructions for that appliance permit it. Some dental sources allow non-abrasive, non-whitening toothpaste, while others warn that toothpaste may scratch or dull splint materials.
Mild fragrance-free liquid soap is the safer generic choice when the material is unknown. If toothpaste has already been used, inspect the surface for fine scratches, cloudiness, roughness, or loss of gloss. Stop using it and contact the dental office if the surface has changed.
Can I soak my mouth splint in vinegar or hydrogen peroxide?
Possibly, but only after confirming that the appliance material, liner, bonded surfaces, colors, and components are compatible. Available instructions differ considerably in dilution, soak time, and frequency, so there is no universal vinegar or hydrogen peroxide recipe.
Follow the appliance-specific directions exactly. Never mix cleaners, increase the concentration, or extend the soak in pursuit of a stronger clean. Rinse the appliance thoroughly afterward.
How often should I deep-clean a mouth splint?
Follow the schedule supplied with the appliance. The reviewed dental-practice recommendations range from weekly to every two to four weeks, which does not support one interval for every splint.
Deep cleaning is an occasional supplement to after-use washing, not a replacement for it. If the original instructions are unavailable, ask the treating dental office before starting a recurring tablet or chemical-soak routine.
Why does my mouth splint still smell after cleaning?
Possible reasons include residue in grooves, incomplete rinsing, damp storage, a dirty case, scratches, inaccessible seams, hardware, or aging material. Smell alone does not prove infection.
Clean the splint and case conservatively, rinse both thoroughly, and let both dry completely. If the odor remains—or if there are cracks, rough areas, deposits, discoloration, or fit changes—request professional assessment instead of escalating to stronger chemicals.
Should a mouth splint be stored dry or in water?
Many night guards and bite splints are stored fully dry in a hard, ventilated case. Some appliance-specific instructions, however, may require water or another storage medium.
Check the documentation or ask the treating dental office. Do not assume that either dry storage or immersion is appropriate for every device. If dry storage is prescribed, never seal the appliance in its case while it is still wet.
The Care Hierarchy to Remember
Follow appliance-specific instructions first. Use gentle after-use cleaning second. Rinse thoroughly, let the splint and case dry completely, and store the appliance as directed. Treat chemical or machine-based deep cleaning as optional and compatibility-dependent.
When odor, buildup, damage, discomfort, or fit changes persist, choose professional assessment rather than stronger home treatment.